Front Flange Gable Vents are the easiest vents to install.

Applying nails or screws through the face of the nail fin has been the common for so many years.
If applying wood trim over the flange, this will look OK.
But, to use the flange as the vent trim, maybe not.

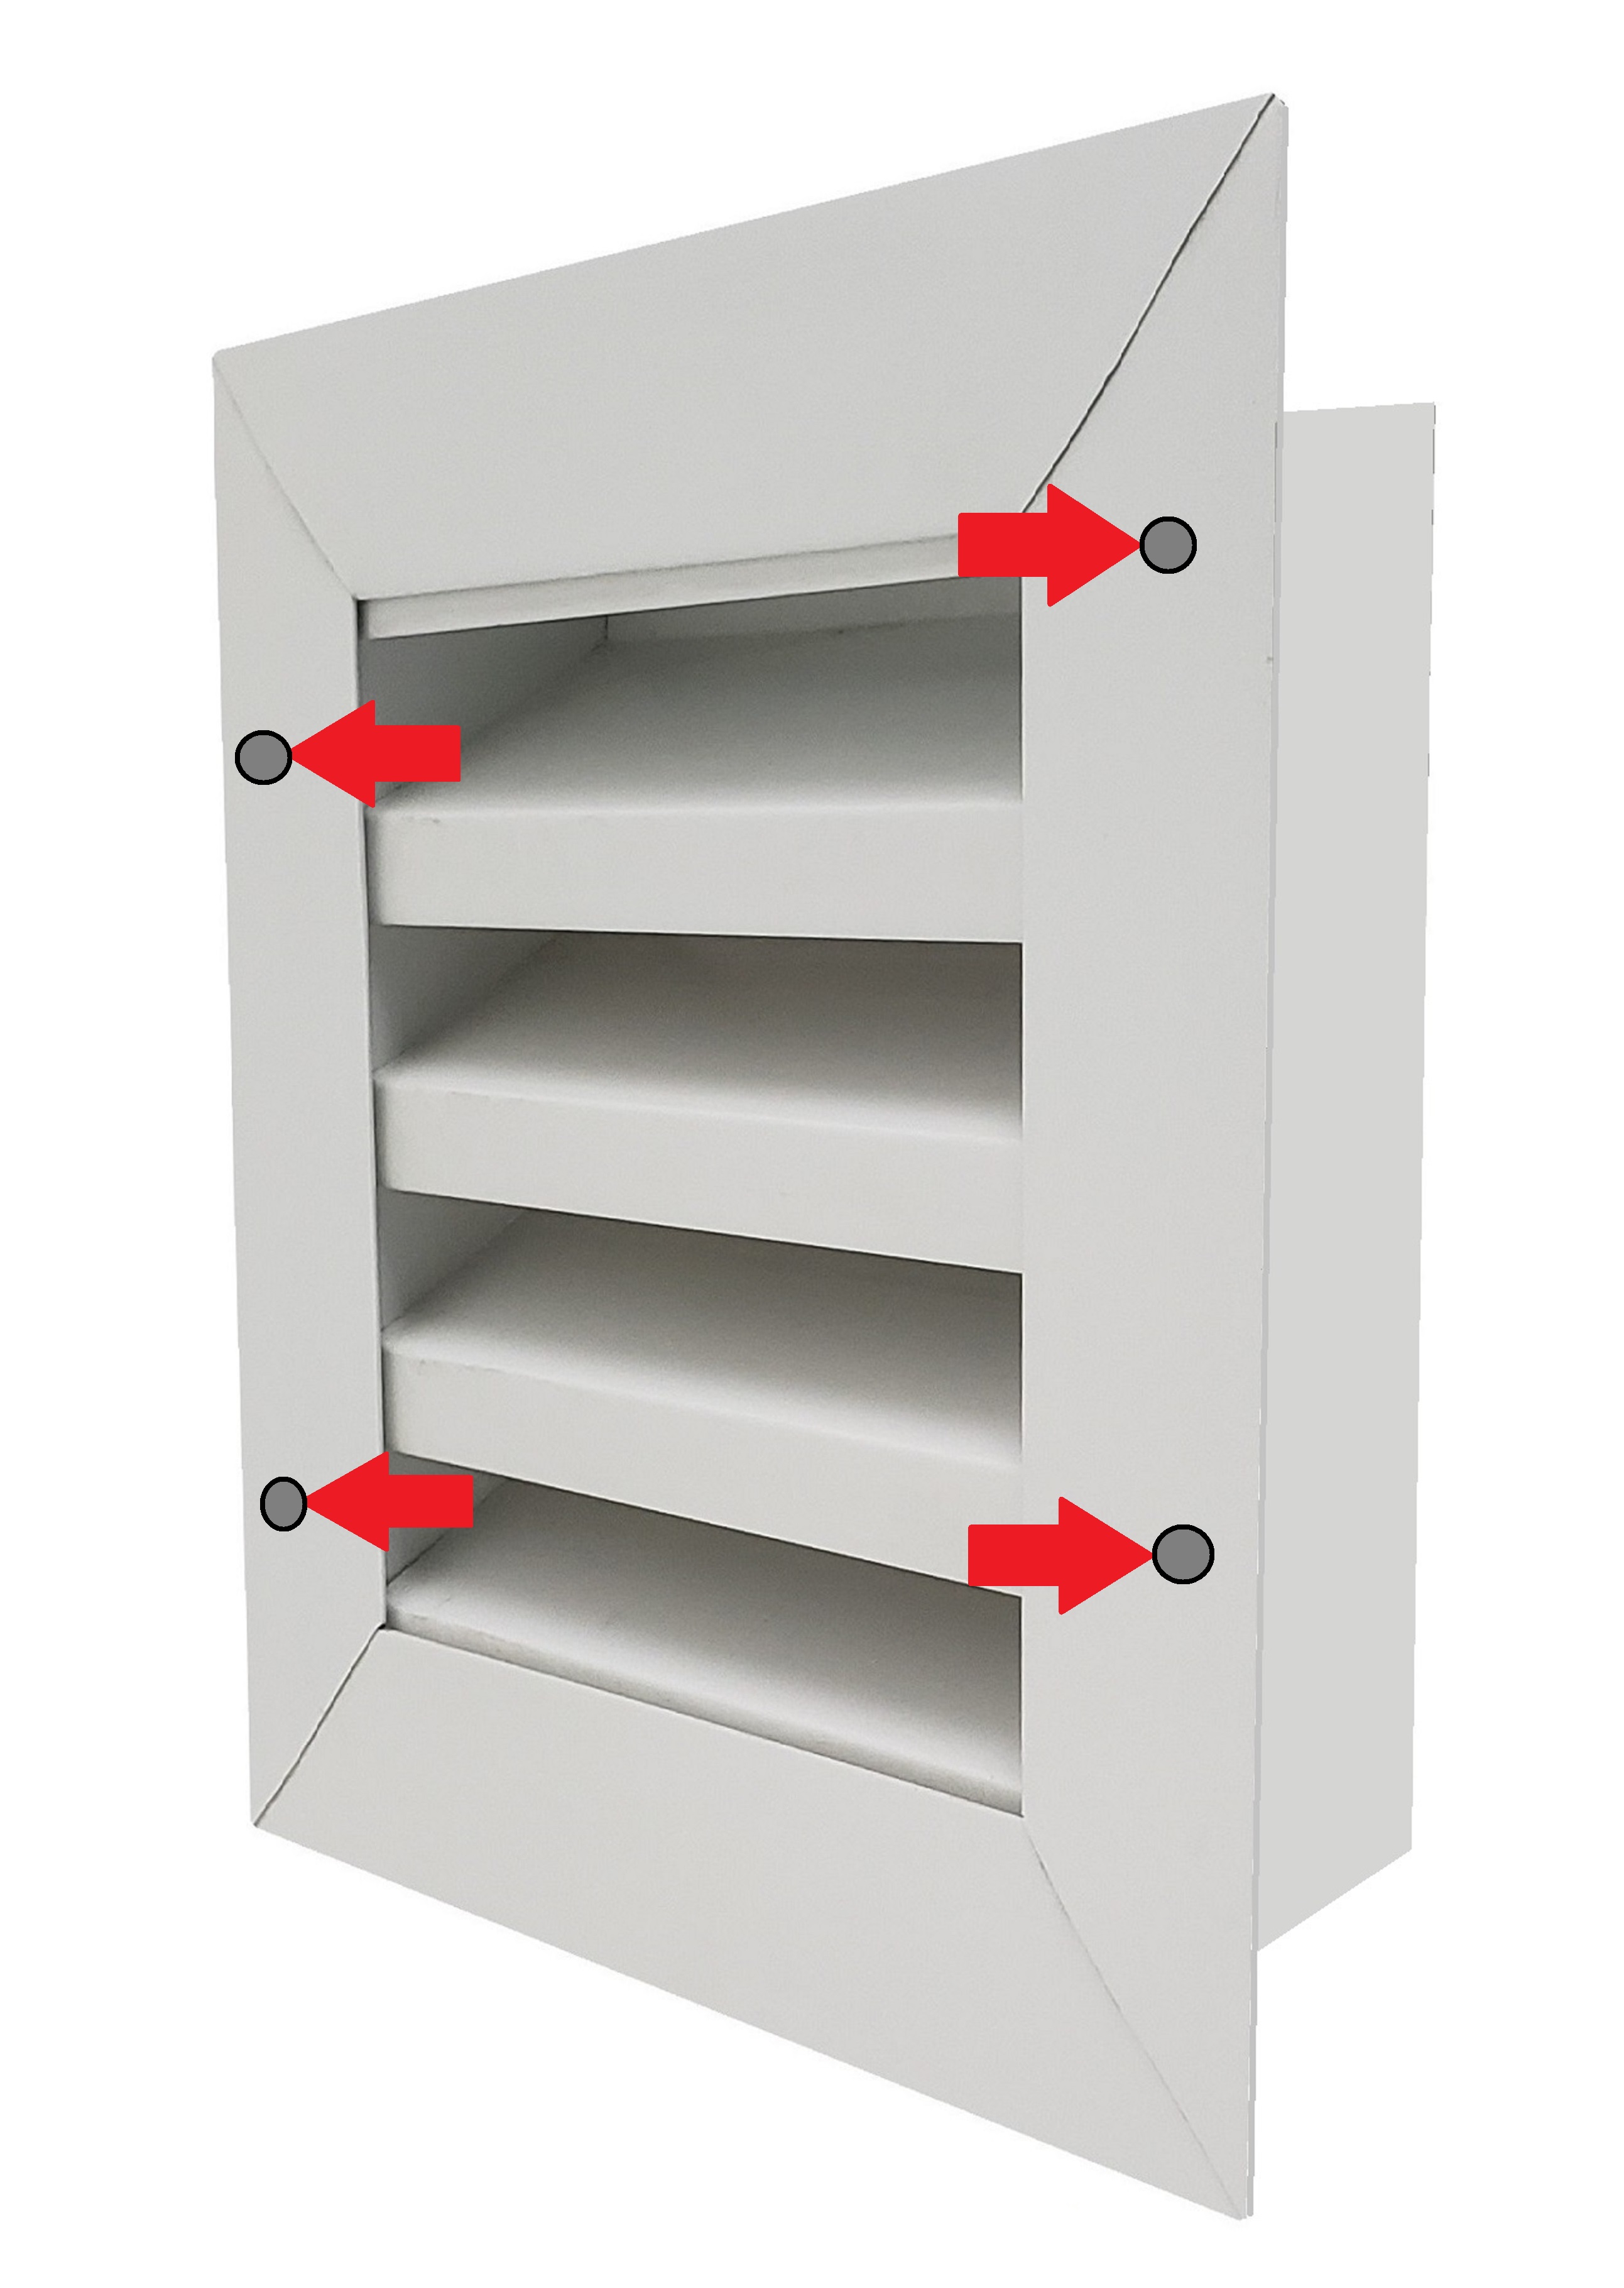
The alternative is to utilize and take advantage of these vents having such a sturdy aluminum frame.
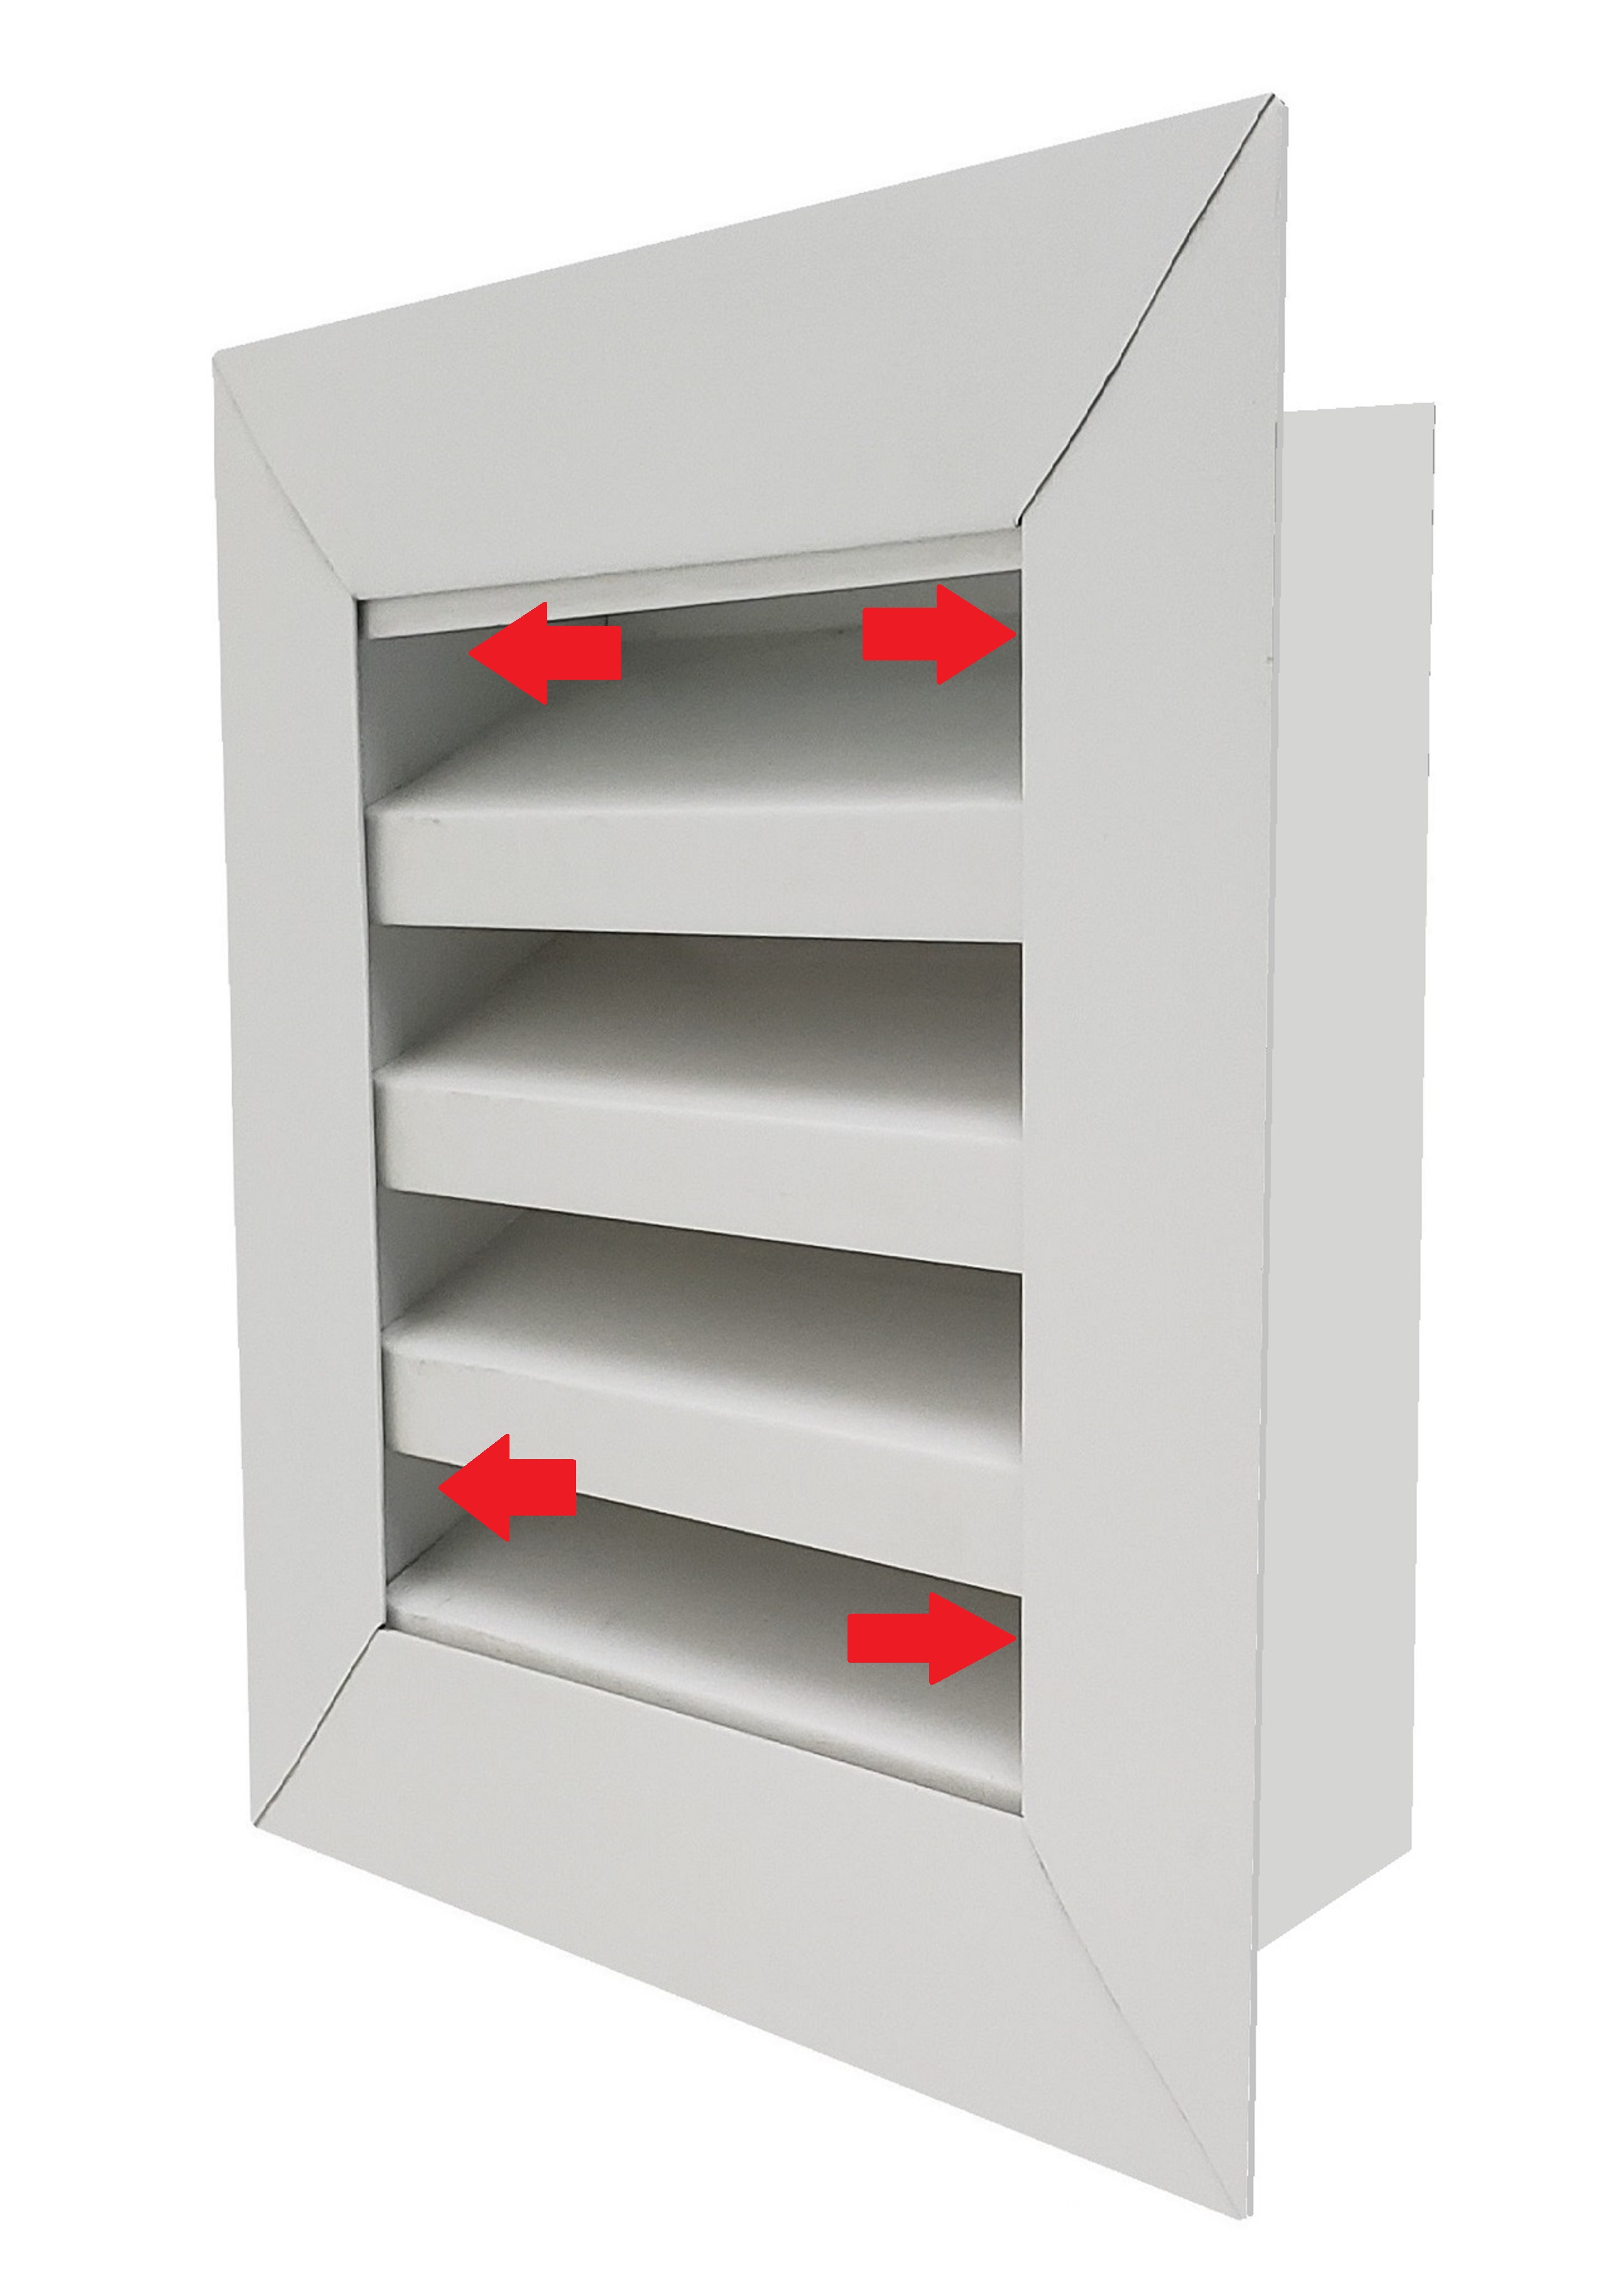
First, insert a 4" or longer screw shaft on the drill being used.
Then, standing in front of the vent, turn the drill pointing to the left.
Place the screw end up behind a louver face and drill it right through the vent wall.
That is if there is wood framing around the wall opening.
If there is no wood framing to attach to from the sides, then install the framing first.
That is, if, the hidden fastener look is desired.
And back to this being the easiest vent to install...
With a full inch and a half of faced flange, the hole does not have to be perfectly cut.
The flange is designed to cover gaps, wavers and flaws.
Just insert the vent into the hole in the wall.
It will stop once the front flange is tight to the wall surface.
If leveling needs corrected, measure, not level.
Very few homes are perfectly level.
And the eye looks for opposing lines to be level with.
Or maybe a front and back flange on the vent might work better for siding?